Visual Timer
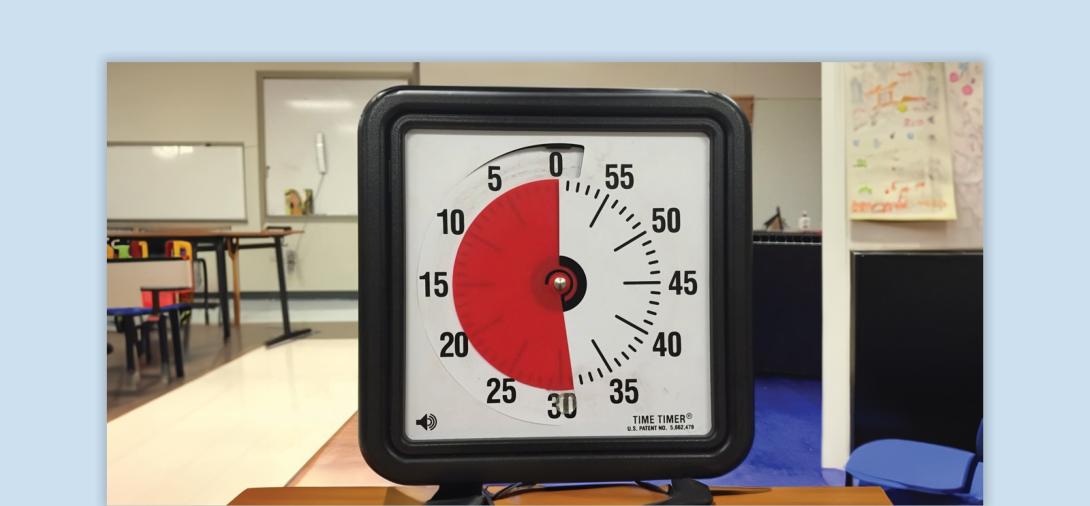
A visual tool used to provide students with the time remaining before a transition, helping them manage their time and expectations.
When to Use:
- Show the amount of time left before a transition (e.g., moving to a different activity, ending a task).
- To support students in managing their behavior and preparing for changes in routine.
How to Use:
- Show the Student the Timer - Display the visual timer where the student can clearly see it. Explain the timer’s purpose.
- Set the Timer - Set the timer for the desired amount of time and explain what will happen when the timer expires. For example, “You have 5 minutes left until we start the next activity.” Initially, set the timer for short intervals and guide the student through the process.
- Provide Warnings - Provide periodic reminders, especially when there is less time remaining, for example, “Two minutes left until it’s time to clean up.”
- When Time is Up - Clearly indicate that the activity is over, and a transition is starting. For example, “Time’s up! It’s time to clean up.”
- Allow Processing Time - Give the student a moment to process the transition and provide a visual to support task completion. Provide positive reinforcement when the student successfully transitions using the visual timer.
Tips:
- Visibility - Ensure the timer is placed where the student can easily see it. For some students, placing the timer out of reach may be necessary.
- Consistent Warnings - Provide more frequent warnings as the timer nears its end.
- Clear Expectations - Explain what will happen when the timer reaches zero, making the transition predictable.
- Individualization - Adapt the frequency of warnings and the language used based on the student’s needs.
Variations:
- Silent Timers - Use timers that signal the end of time with light or vibration for students sensitive to sound or those with hearing impairments.
- Self-Management - Encourage the student to help set the timer to foster independence and engagement with the process.
- Different Timer Types - Use digital or analog timers depending on the student’s preferences or abilities.
Related Content

Autism
Visual Supports
Discover the power of visual supports for supporting students with ASD. Learn about implementation steps, skills, and resources to enhance independence.
View Course
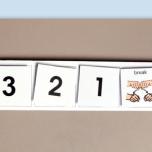
Autism, Behavior
Visual Countdown
Teacher controlled visual countdown that is flexible regarding time.
View Tool/Template